To set up a basic home streaming studio, start by selecting a quiet, well-lit space. Aim for at least 5 Mbps upload speed for smooth broadcasts. Next, invest in reliable audio and video gear, like a good web camera and USB microphone. Consider soundproofing with carpets or heavy curtains for quality audio. Proper lighting can enhance visual appeal. It’s also essential to choose suitable streaming software that aligns with your content goals. Continue exploring essential tips for a successful setup.
Key Takeaways
- Choose a quiet and spacious room, controlling lighting with softboxes or ring lights for optimal visual clarity.
- Invest in quality audio and video gear, like a DSLR and USB microphone, to enhance streaming quality.
- Use soundproofing techniques such as acoustic panels or heavy curtains to improve audio performance and reduce outside noise.
- Ensure a reliable internet connection with at least 5 Mbps upload speed for smooth streaming experience.
- Select streaming software that is resource-efficient and aligns with your content goals to engage viewers effectively.
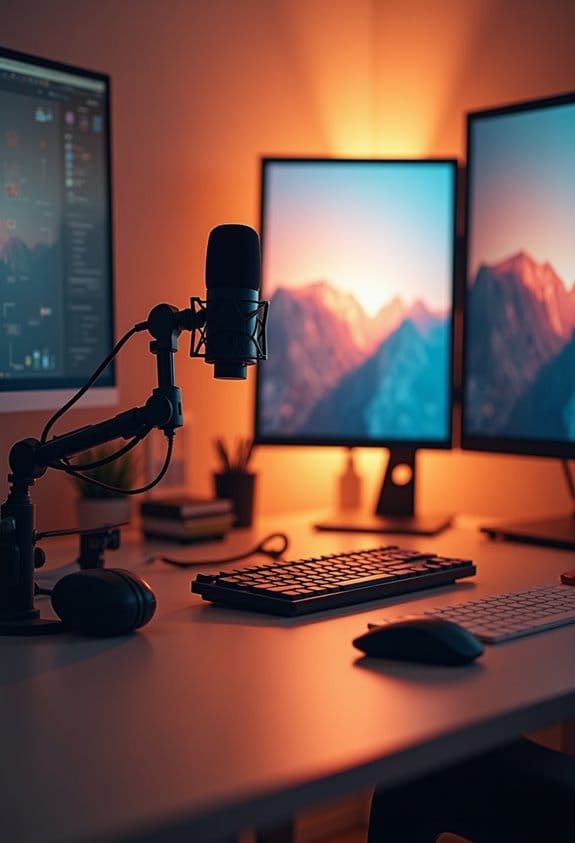
Select the Ideal Space for Your Streaming Studio
So, you’re thinking about setting up a streaming studio? That’s awesome! The first thing you need to do is pick the right space. Ideally, you want a room that’s quiet and has enough room for all your equipment. It doesn’t have to be huge, but a dedicated area can really help with keeping everything organized, which looks professional and makes streaming easier.
Now, let’s talk about lighting. While natural light can be nice, having control over your lighting is key to creating the right atmosphere. Think about investing in some softbox lights or ring lights; they can make a huge difference in how you look on camera! And don’t underestimate sound – a room with carpets or curtains can help absorb noise and improve your audio quality.
Make sure your streaming spot has a strong and stable internet connection, too. You don’t want to be in the middle of an epic gaming session only to lose your stream because of lag. Plus, a backdrop that reflects your personality or brand will keep your viewers engaged. For example, you can set up a bookshelf with your favorite games or display some cool artwork.
Utilizing a pop up backdrop can enhance your studio’s aesthetic and streamline your setup process.
Lastly, take a quick inventory of power outlets. You’ll need enough for all your gadgets and anything you might want to add later on. Once you’ve nailed down the perfect space, you’ll be one step closer to creating an amazing streaming experience! Let’s move on to some essential equipment for your studio!
Recommended Products

ACCURATE VERSATILITY - With a class-leading SSI of 82 (3200K) and 72 (5600K), CRI of 97 and TLCI of 98, an expanded CCT range of 2700K-7500K, and a wide G/M adjustment of +/-150, PavoTube II 30C is both highly accurate and adaptable

Godox SK400II Speedlite Monolight has a Large LED Display, Precise Output Displayed on LCD Panel, 40 Steps from 1/16-1/1. Auto Memory and Recovery of Adjusted Panel Settings

【Powerful 220W Bi-Color Continuous Output Lighting】Achieve stunning, true-to-life visuals with a high CRI/TLCI ≥98. The adjustable color temperature (2800K-6500K) eliminates the need for gel filters, allowing you to perfectly match any ambient light—from warm indoor lamps to cool daylight—instantly. This single light or combined with other Godox light kit components is ideal for creating the perfect mood in every shot.
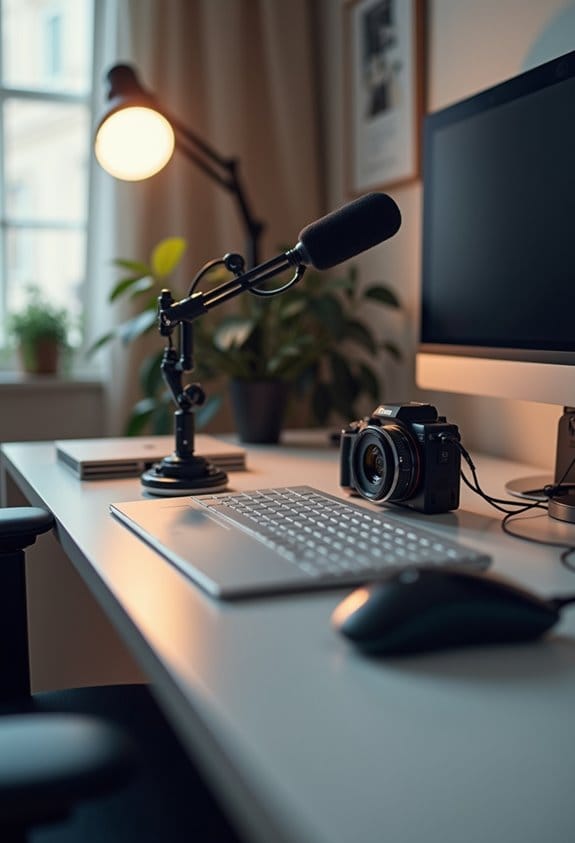
Choose Top Audio and Video Gear
When it comes to choosing the right audio and video gear for streaming, you really want to make sure your setup shines. For video, think about investing in a DSLR or mirrorless camera that shoots in 1080p. If that sounds too fancy, a good-quality webcam can still do the job quite nicely. The key is to find something that gives you clear visuals without breaking the bank.
Now, let’s talk about audio. You definitely want a solid external USB microphone to ensure your voice comes through loud and clear. I recommend something like the Blue Yeti – it’s super user-friendly and will sound way better than that built-in mic on your laptop. If you’re moving around a lot while streaming, a lavalier microphone could be a great option too; you clip it on your clothes for effortless sound capture.
Lastly, don’t forget about the internet! A steady connection is crucial; aim for at least 5 Mbps upload speed to keep your streaming smooth, especially when you’re showcasing that high-quality video. Think of your gear as the foundation of your streaming success; getting the right tools can really take your content to the next level. What do you think you’ll start with first? Also, to protect your valuable streaming equipment from power interruptions, consider investing in a UPS with Automatic Voltage Regulation.
Recommended Products

Faithfull Recreation of AKG C12 Tube Mic

ADVANCED MICROPHONE MODELLING: The Antelope Audio Edge Go features 18 real-time mic emulations, crafted through a precise analysis of original models in one of Europe’s top anechoic chambers. These emulations capture the unique character and detail found in iconic microphones, offering the same sonic expressiveness heard on hit records.

The original Mini K47! Genuine 34mm gold and brass large-diaphragm capsule.
Explore Proven Soundproofing Techniques for Home Studios

If you’re looking to create an awesome soundproofing environment for your home studio, you’re in for a treat! Effective soundproofing can really boost your audio quality. One of the best starting points is to add acoustic panels to your walls and ceiling. These panels help minimize noise, making your recordings much clearer and crisp.
Along with that, don’t underestimate the power of heavy curtains on your windows. They not only reduce outside noise but also give a nice professional look to your space. Plus, you can hang some blankets or duvets around the room. These soft materials work wonders for absorbing sound waves and cutting down on unwanted echoes.
Oh, and if your studio is located under another room, consider using rugs or carpets. They absorb sound significantly, creating a more peaceful atmosphere. All these small changes add up, giving you a serene environment where you can focus on your passion for streaming or recording. It’s pretty amazing how these simple techniques can transform your home studio setup! Using specially designed sound blankets can further enhance noise reduction and improve overall sound quality.
Recommended Products

MULTIPLE CONFIGURATIONS: Use these Hush Panel Cubicle Kits as the building block of your new office design. Whether you need an individual workstation, small meeting space, or an entire cubicle grid, these partition walls are perfect for your space.

【Modular & Scalable System】Easily configure secure single, dual, or triple-person office desk workstations using interlocking panels and reinforced frames, adapting perfectly to growing teams or changing layouts.

[ Superior Sound Isolation ] Equipped with 2 layers of soundproof laminated glass, and Acoustic Insulation Structure walls 6 layers (Aluminum frame structure, Film-laminated Steel Panel, PET Sound-absorbing Board, Eco-friendly Acoustic Panel, Premium Textured Fabric), the booth achieves 35dB(±5dB) reduction, ensuring a peaceful, private workspace.
Light Up Your Stream for Success
Hey there! Let’s talk about how important lighting is for your stream. Good lighting can really transform your setup and make your content look so much better. Ideally, you want to use natural light as your main source, so try to set up your workspace near a window. This way, you get that beautiful soft light flowing in.
If you find that natural light isn’t enough—maybe you’re streaming at night or it’s a gloomy day—adjustable LED lights are a great backup plan, and you can find decent ones starting around 29 bucks. Just remember, it’s super important to keep your light sources around the same color temperature, ideally around 5600K, so everything looks coherent and professional.
When you position your lights, aim to have them in front of you and slightly to the sides to avoid any harsh shadows on your face. Using diffusers can also help soften the light, which is perfect for an inviting look. With these simple tips, you can enhance your stream’s visuals and create a more enjoyable experience for your viewers. Choosing lights with a high CRI rating ensures more vibrant and natural colors in your video feed.
Now, speaking of your setup, let’s chat about background elements that can really pull your stream together!
Recommended Products

High CRI Chip LEDs paired with 1/2 stop soft diffusion panel

95 CRI Chip LEDs paired with 1/2 stop soft diffusion panel

Customizable Lighting Options: Choose from 3000K, 4000K, and 5000K color temperatures and 30W, 40W, or 50W power settings to perfectly match your space and needs
Incorporate Essential Accessories and Creative Backgrounds
Hey there! You know, a lot of people don’t realize just how important backgrounds are for a streaming setup. A well-chosen background can really change the way your content feels. Think about adding a feature wall with a bold accent color—this can really help your personal brand pop! Additionally, consider using shelves to showcase fun props that reveal a bit of your personality; it makes your streams more engaging and keeps viewers curious.
If you want to keep things flexible, why not try a portable backdrop made of removable panels or fabric? This way, you can easily switch things up when you feel like it. And for a professional touch, using chroma key technology lets you create any digital background you want—imagine a cool animated backdrop that fits perfectly with your content!
To boost not just your visuals but also your sound quality, think about adding some soundproof foam panels and soft furnishings. These will help reduce background noise and keep distractions to a minimum. When you combine these elements with essential accessories—like a good audio interface and quality lighting—you’ll really elevate your streaming game. Speaking of lighting, that’s another crucial aspect we can explore! Also, incorporating advanced detection technology from security cameras can inspire innovative ways to enhance your streaming setup’s interactivity and responsiveness.
Recommended Products

SUPERSIZE YOUR MEDIA ENTERTAINMENT | KODAK Front Portable Projection Screen Displays Stunning 8K/4K Ultra HD 3D Movies, TV, Sports, School Presentations, Office PowerPoints, Video Games, Streaming Services, Watch Party Content & Screencasts from Your Phone | Versatile, Lightweight, Travel-Friendly Design is Perfect for Indoor & Outside Viewing in LED, LCD & DLP Formats
【Full-body Chroma】Professional Chroma Key Screen with Floor Extension 7×7×7 ft – Ideal for Standing Full-Body Keying, Delivering Optimal Camera Chroma Key Performance

Your Personal Space: This 3-panel soundproof room divider (72.4×13.7×65.2 in / 1840×350×1655 mm) is perfect for setting up your own office space in a public area without disrupting the existing layout. It helps reduce unnecessary distractions and is ideal for use in offices, schools, hospitals, bedrooms, living rooms, kitchens, and other indoor spaces.
Pick the Best Streaming Software for Your Needs
When you’re setting up a home streaming studio, picking the best streaming software is key. You want something that’s easy to use and lets you stream across different platforms without a hitch. For instance, OBS Studio is a crowd favorite because it has a straightforward interface and lets you share your screen while keeping the audio crisp. This is perfect for things like online tutorials or engaging presentations.
On the flip side, if you’re looking for something with more advanced features, Wirecast Pro could be the way to go. Just keep in mind that it does come with a subscription fee. Whichever option you choose, make sure it works well with your hardware to prevent any annoying connectivity hiccups. It’s also smart to look for software that doesn’t drain your resources, especially if you want to stream in high quality.
And speaking of quality, features like animated backgrounds can really take your streams up a notch, helping you to create an eye-catching visual experience that keeps people tuned in. As you consider your streaming setup, think about how the software will fit into your overall goals, making your content as engaging as possible!
Additionally, ensuring your PC has a powerful processor like the Intel Core i9-14900KF can significantly enhance your streaming quality and performance.
Establish a Reliable Internet Connection for Streaming Success
If you want to have streaming success, a reliable internet connection is a must! Think of it like building a solid house; without a strong foundation, everything else can crumble. Your upload speed is key here, and it can vary quite a bit—anywhere from 672 kbps to a whopping 61.5 Mbps, depending on what platform you’re using and the type of content you’re streaming. For instance, if you’re gaming on Twitch with fast action, you’ll need more speed compared to sharing still images on Facebook.
Now, let’s chat about how to get the best performance. Using an ethernet connection is your best bet; it offers a more stable and quicker connection than Wi-Fi, which can be a bit flaky. Before you hit that “go live” button, it’s smart to run a quick speed test to make sure your upload speed meets the platform’s minimum requirements. If you’re facing issues like lag or dropouts, consider upgrading your internet plan or checking your equipment to keep things running smoothly.
To truly showcase your streaming setup, pairing your connection with a high-quality 4K streaming webcam can vastly improve your video output and viewer engagement.
In the next steps, we’ll discuss optimizing your streaming setup for the best viewer experience!
Frequently Asked Questions
What Do I Need for a Basic Streaming Setup?
For a basic streaming setup, one needs microphone selection, camera quality, and lighting setup. Additionally, consider backdrop options, streaming software, an audio interface, appropriate internet speed, tripod stability, editing tools, and platform compatibility.
How to Set up a Basic Home Recording Studio?
To set up a basic home recording studio, consider audio interface setup, microphone placement tips, and soundproofing techniques. Incorporate budget-friendly equipment and software recommendations, while managing recording levels and ensuring proper video lighting and camera selection.
Can I Live Stream Without 1000 Subscribers?
The majority of live streams on platforms like YouTube and Facebook occur without subscriber requirements. While subscriber benefits enhance monetization and community building, anyone can engage audiences through live streaming, managing technical difficulties and following streaming guidelines.
What Are Common Streaming Mistakes to Avoid?
Common streaming mistakes include neglecting audio quality, improper lighting setup, inadequate internet speed, poor microphone placement, unconsidered webcam angle, ignoring background noise, and overlooking overlay graphics and engagement tactics for viewer interaction.